
Features
Show Possible Coming Trades
Get advance notice when signals are forming — prepare before they trigger.
What It Does
Shows: Small + icon when conditions approach signal thresholds
Purpose: Early warning for potential setups
Not: A trade signal itself
How It Works
Monitor Oscillator
Tracks when price action approaches thresholds
Show Warning
Displays
+icon when close to signalPrepare
You analyze and get ready
Wait for Signal
Only trade on confirmed signals
Compatibility
Supported Modes
- Normal Only
- Smart Only
- Normal + Smart
These modes use threshold-based logic that allows prediction.
Not Available
- AI Mode
- AI Sniper
- HL Sniper
These modes use different logic that does not support early warnings.
Visual Examples
Long
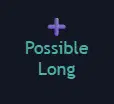
+ icon showing potential long
Short
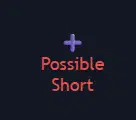
+ icon showing potential short
When to Use
Enable For:
- Planning ahead
- Setting alerts
- Preparing analysis
- Managing multiple charts
- Less screen time
Disable For:
- Clean charts
- Reducing noise
- AI/Sniper modes
- Reactive trading
- Avoiding confusion
Trading Workflow
With This Feature:
1. See + icon (warning)
   ↓
2. Check analysis
   ↓
3. Prepare order/alerts
   ↓
4. Wait for actual signal
   ↓
5. Execute trade
Important Reminders
Quick Reference
| Feature | Purpose | Action Required |
|---|---|---|
+ Icon |
Warning only | Prepare, do not trade |
| Actual Signal | Trade entry | Execute if confirmed |
| No Icon | No setup near | Continue monitoring |
Best Practices
- Use for preparation and planning
- Combine with your own analysis
- Set alerts at key levels
- Do not trade on warnings alone
- Do not chase if the signal does not confirm